AWS IoT CoreにEC2でpub/subをしてみた

AWS re:PostでAWS IoT関連の質問をよく見かけるようになり、気になったので触ってみました。
やること
下記の図のようにEC2を2台作成してAWS IoT Coreへのpub/subを試してみます。
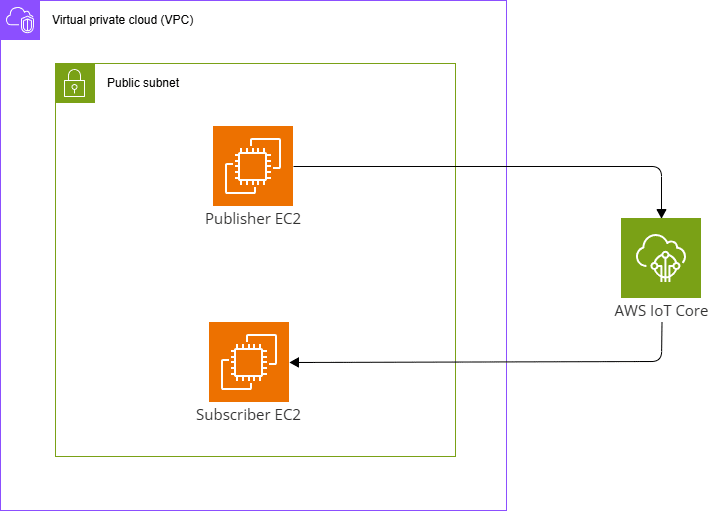
EC2内で動かすコードは以下のドキュメントのものを参考にします。
設定
EC2作成
まずはEC2を作成していきます。
作成は以下のCloudFormationで行います。
AWSTemplateFormatVersion: "2010-09-09"

Description: vpc,ec2 stack

Mappings:
# ------------------------------------------------------------#
# Mappings
# ------------------------------------------------------------#
  RegionMap:
    ap-northeast-1:
      VPCCIDR: 10.0.0.0/16
      AvailabilityZone: ap-northeast-1a
      pubSubnet1CIDR: 10.0.0.0/24

Metadata:
# ------------------------------------------------------------#
# Metadata
# ------------------------------------------------------------#
  AWS::CloudFormation::Interface:
    ParameterGroups:
        Parameters:
          - EC2VolumeSize
          - EC2VolumeIOPS
          - EC2AMI
          - EC2InstanceType

Parameters:
# ------------------------------------------------------------#
# Parameters
# ------------------------------------------------------------#
  MyIP:
    Type: String

  EC2VolumeSize:
    Default: 32
    Type: Number

  EC2VolumeIOPS:
    Default: 3000
    Type: Number

  EC2AMI:
    Default: '/aws/service/ami-amazon-linux-latest/al2023-ami-kernel-6.1-x86_64'
    Type: 'AWS::SSM::Parameter::Value<AWS::EC2::Image::Id>'

  EC2InstanceType:
    Default: t3.micro
    Type: String

Resources:
# ------------------------------------------------------------#
# VPC
# ------------------------------------------------------------#
  VPC:
    Type: AWS::EC2::VPC
    Properties:
      CidrBlock: !FindInMap
        - RegionMap
        - !Ref 'AWS::Region'
        - VPCCIDR
      EnableDnsSupport: true
      EnableDnsHostnames: true
      Tags:
        - Key: Name
          Value: test-vpc

# ------------------------------------------------------------#
# InternetGateway
# ------------------------------------------------------------#
  InternetGateway:
    Type: AWS::EC2::InternetGateway
    Properties:
      Tags:
        - Key: Name
          Value: !Sub test-igw

  InternetGatewayAttachment:
    Type: AWS::EC2::VPCGatewayAttachment
    Properties:
      InternetGatewayId: !Ref InternetGateway
      VpcId: !Ref VPC

# ------------------------------------------------------------#
# Subnet
# ------------------------------------------------------------#
  PublicSubnet01:
    Type: AWS::EC2::Subnet
    Properties:
      AvailabilityZone: !FindInMap
        - RegionMap
        - !Ref 'AWS::Region'
        - AvailabilityZone
      CidrBlock: !FindInMap
        - RegionMap
        - !Ref 'AWS::Region'
        - pubSubnet1CIDR
      MapPublicIpOnLaunch: true
      Tags:
        - Key: Name
          Value: test-public-01
      VpcId: !Ref VPC

# ------------------------------------------------------------#
# RouteTable
# ------------------------------------------------------------#
  PublicRouteTable:
    Type: AWS::EC2::RouteTable
    Properties:
      VpcId: !Ref VPC
      Tags:
        - Key: Name
          Value: test-public-rtb

  PublicRouteTableRoute:
    Type: AWS::EC2::Route
    Properties:
      DestinationCidrBlock: 0.0.0.0/0
      GatewayId: !Ref InternetGateway
      RouteTableId: !Ref PublicRouteTable

  PublicRtAssociation1:
    Type: AWS::EC2::SubnetRouteTableAssociation
    Properties:
      RouteTableId: !Ref PublicRouteTable
      SubnetId: !Ref PublicSubnet01

# ------------------------------------------------------------#
# Security Group
# ------------------------------------------------------------#
  EC2SG:
    Type: AWS::EC2::SecurityGroup
    Properties:
      GroupDescription: for EC2
      GroupName: EC2-sg
      SecurityGroupEgress:
        - CidrIp: 0.0.0.0/0
          FromPort: -1
          IpProtocol: -1
          ToPort: -1
      SecurityGroupIngress:
        - FromPort: 22
          IpProtocol: tcp
          CidrIp: !Ref MyIP
          ToPort: 22
      Tags:
        - Key: Name
          Value: ec2-sg
      VpcId: !Ref VPC

# ------------------------------------------------------------#
# IAM
# ------------------------------------------------------------#
  EC2IAMRole:
    Type: AWS::IAM::Role
    Properties:
      AssumeRolePolicyDocument:
        Version: "2012-10-17"
        Statement:
          - Effect: Allow
            Principal:
              Service:
                - ec2.amazonaws.com
            Action:
              - 'sts:AssumeRole'
      ManagedPolicyArns:
        - arn:aws:iam::aws:policy/AmazonSSMManagedInstanceCore
      RoleName: !Sub iam-role-ec2-${AWS::Region}
      Tags:
        - Key: Name
          Value: !Sub iam-role-ec2-${AWS::Region}

  EC2IAMInstanceProfile:
    Type: AWS::IAM::InstanceProfile
    Properties:
      InstanceProfileName: !Sub iam-instanceprofile-ec2-${AWS::Region}
      Roles:
        - !Ref EC2IAMRole

# ------------------------------------------------------------#
# Key
# ------------------------------------------------------------#
  EC2KeyPair:
    Type: 'AWS::EC2::KeyPair'
    Properties:
      KeyName: test-key

# ------------------------------------------------------------#
# EC2
# ------------------------------------------------------------#
  PubEC2:
    Type: AWS::EC2::Instance
    Properties:
      BlockDeviceMappings:
        - DeviceName: /dev/xvda
          Ebs:
            DeleteOnTermination: true
            Encrypted: true
            Iops: !Ref EC2VolumeIOPS
            VolumeSize: !Ref EC2VolumeSize
            VolumeType: gp3
      DisableApiTermination: false
      IamInstanceProfile: !Ref EC2IAMInstanceProfile
      ImageId: !Ref EC2AMI
      InstanceType: !Ref EC2InstanceType
      KeyName: !Ref EC2KeyPair
      NetworkInterfaces:
        - DeleteOnTermination: true
          DeviceIndex: 0
          GroupSet:
            - !Ref EC2SG
          SubnetId: !Ref PublicSubnet01
      Tags:
        - Key: Name
          Value:  !Sub test-ec2-pub

  SubEC2:
    Type: AWS::EC2::Instance
    Properties:
      BlockDeviceMappings:
        - DeviceName: /dev/xvda
          Ebs:
            DeleteOnTermination: true
            Encrypted: true
            Iops: !Ref EC2VolumeIOPS
            VolumeSize: !Ref EC2VolumeSize
            VolumeType: gp3
      DisableApiTermination: false
      IamInstanceProfile: !Ref EC2IAMInstanceProfile
      ImageId: !Ref EC2AMI
      InstanceType: !Ref EC2InstanceType
      KeyName: !Ref EC2KeyPair
      NetworkInterfaces:
        - DeleteOnTermination: true
          DeviceIndex: 0
          GroupSet:
            - !Ref EC2SG
          SubnetId: !Ref PublicSubnet01
      Tags:
        - Key: Name
          Value:  !Sub test-ec2-sub
上記のCloudFormationテンプレートでEC2を2台作成します。
ファイルをSCPで送れるようにセキュリティグループでSSHを許可するようにしました。
CloudFormationテンプレートファイルを作成したら以下のAWS CLIコマンドでデプロイを行います。
aws cloudformation create-stack --stack-name スタック名 --template-body file://CloudFormationテンプレートファイル名 --parameters ParameterKey=MyIP,ParameterValue=SSHを許可するIPアドレス/32 --capabilities CAPABILITY_NAMED_IAM
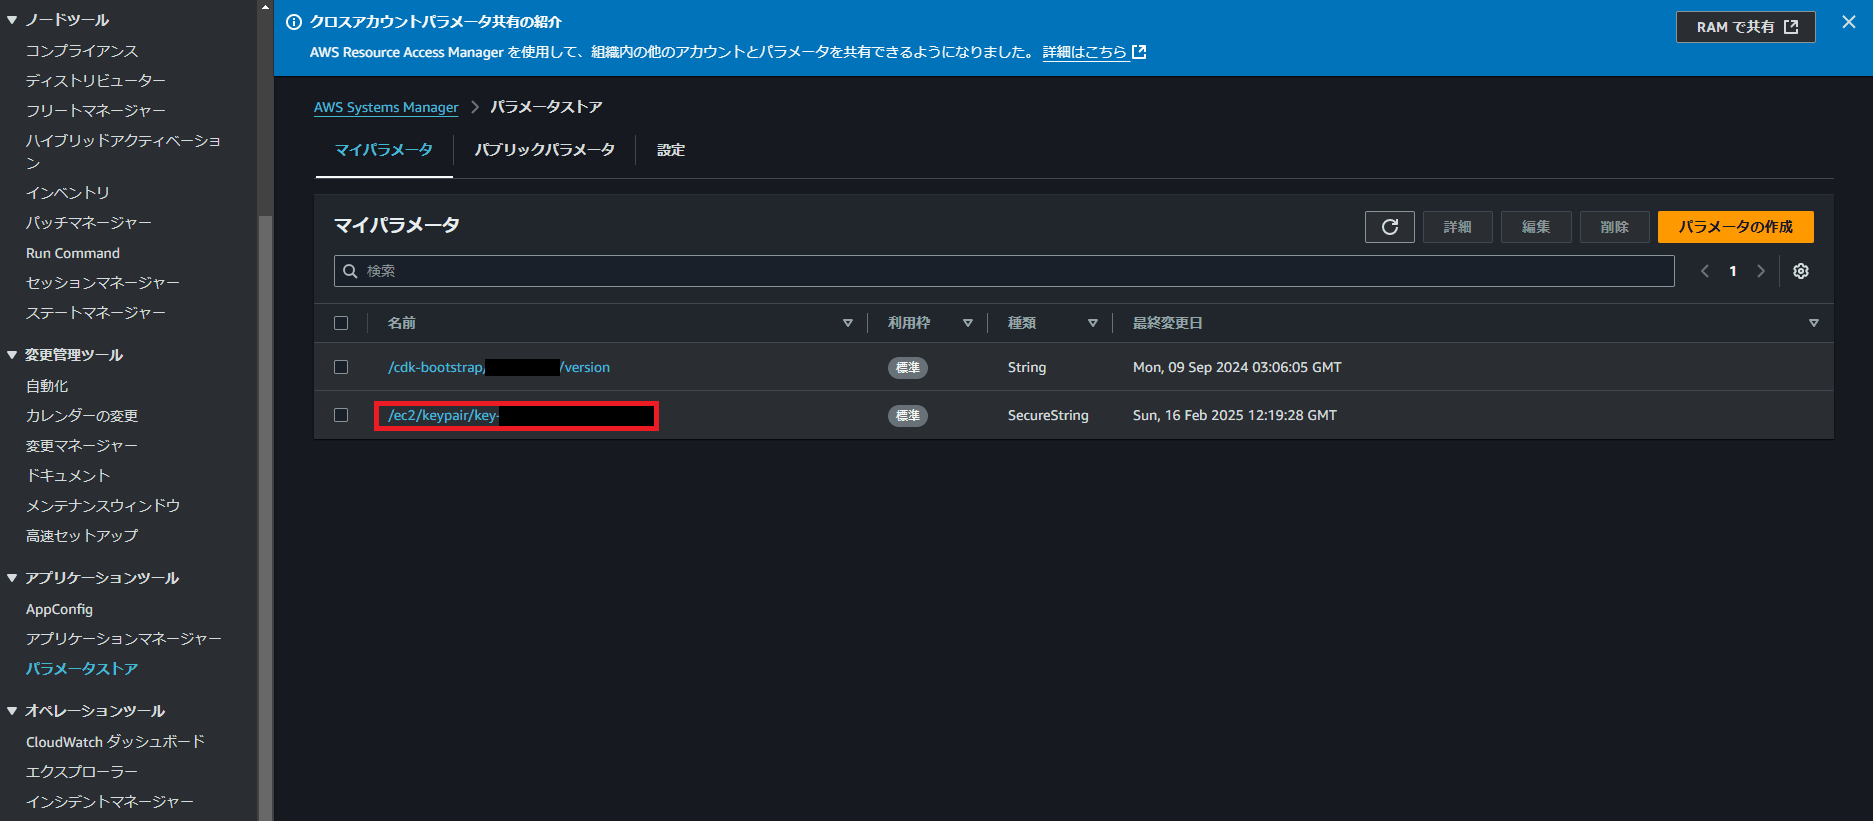
CloudFormationテンプレートのデプロイが完了したらSystems Manager Parameter StoreからSCPに使用する秘密鍵を取得します。
マネジメントコンソールからSytems Managerの画面を開き、画面左のメニューから「パラメータストア」をクリックします。
クリック後「/ec2/keypair/key-~」というものが作成されているので、クリックして「復号化された値を表示」のトグルをクリック後、「-----BEGIN RSA PRIVATE KEY-----」から「-----END RSA PRIVATE KEY-----」までをコピーしてファイルの保存します。
AWS IoT Core設定
EC2の作成が完了したらAWS IoT Core側の設定を行います。
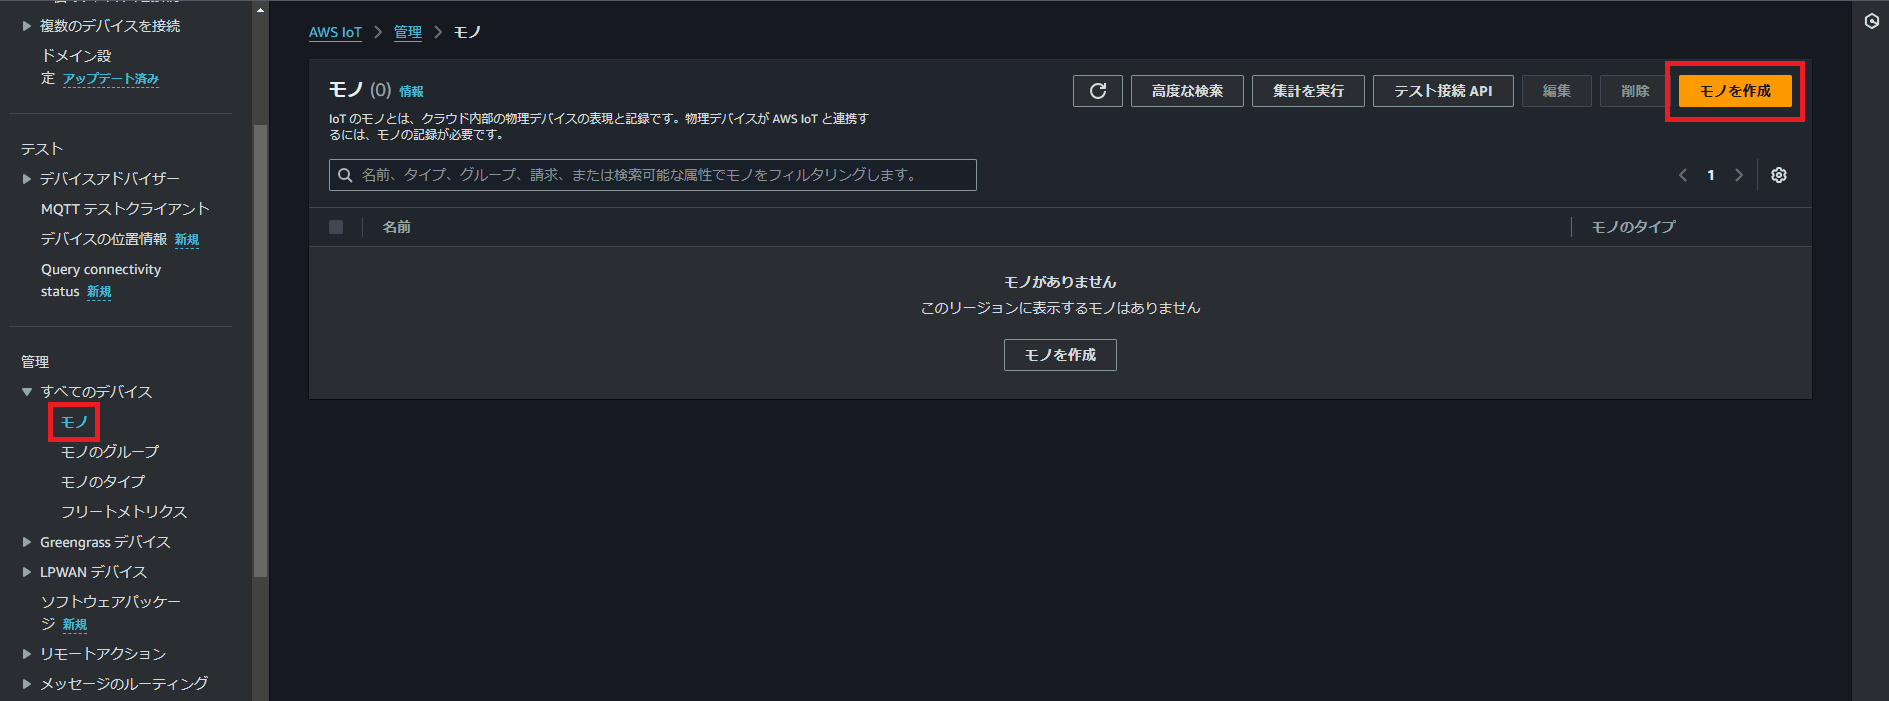
マネジメントコンソールからAWS IoT Coreのページへ移動します。
移動後、画面左のメニューから「モノ」をクリックして「モノを作成」をクリックします。
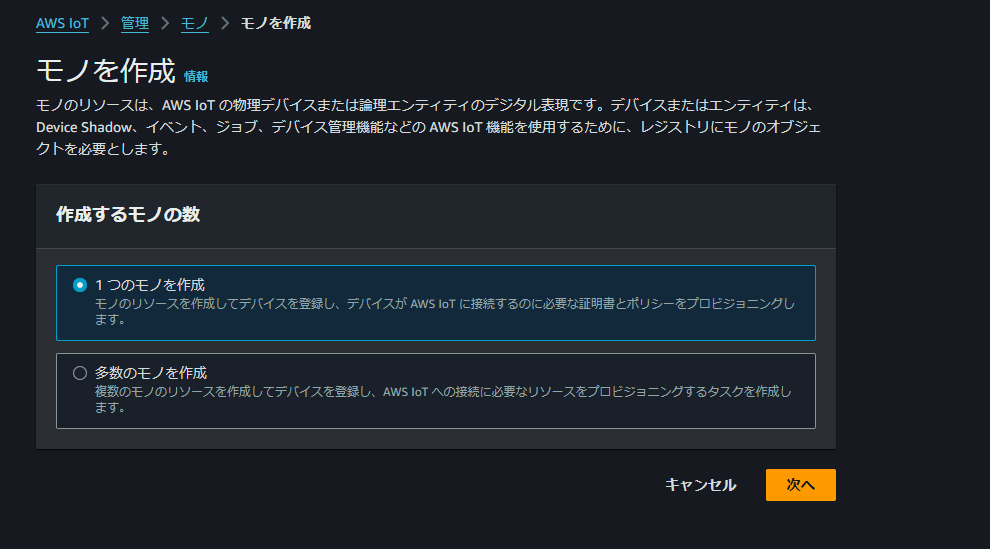
クリック後、「1つのモノを作成」を選択して「次へ」をクリックします。
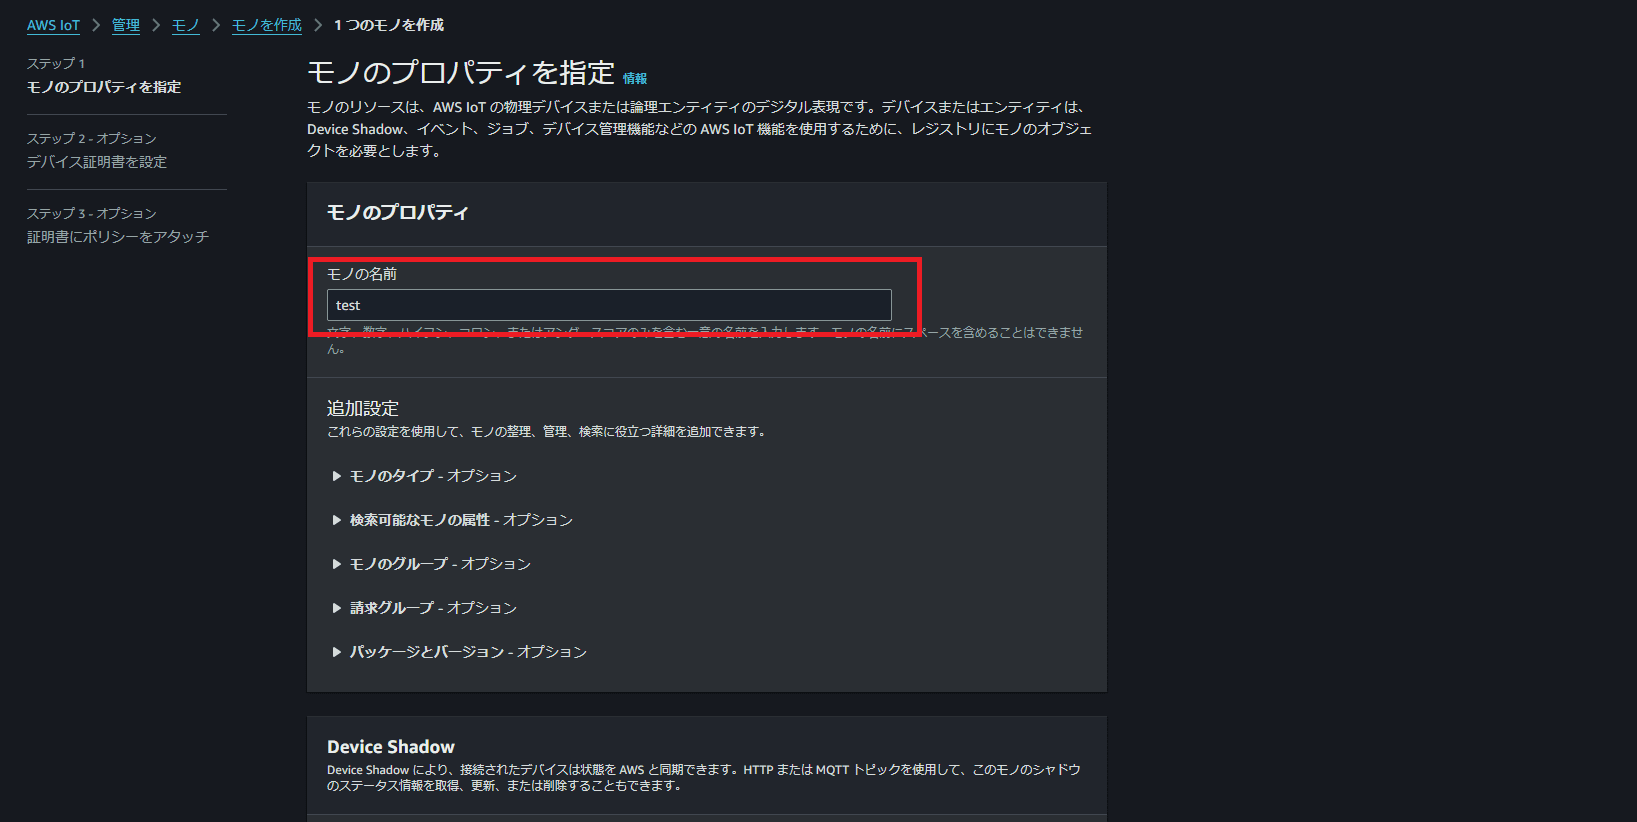
次の画面で「モノの名前」を入力して画面下の「次へ」をクリックします。
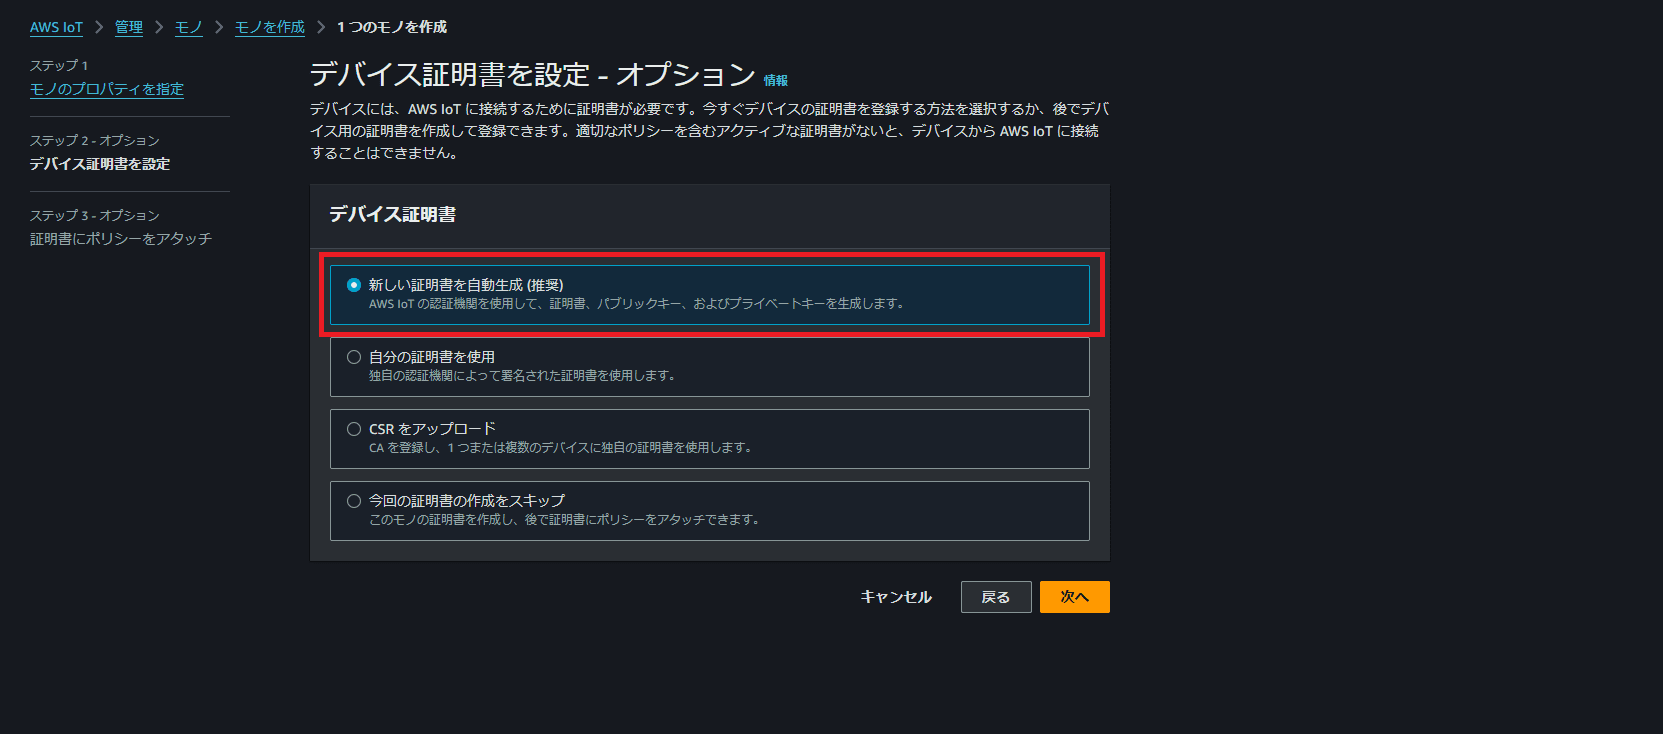
次の画面でデバイス証明書を作成します。
ここで作成した証明書はEC2にアップロードして使用します。
「新しい証明書を自動生成」を選択して「次へ」をクリックします。
次の画面で証明書に紐づけるポリシーを設定できますが、一旦何も設定しないで「モノを作成」をクリックします。

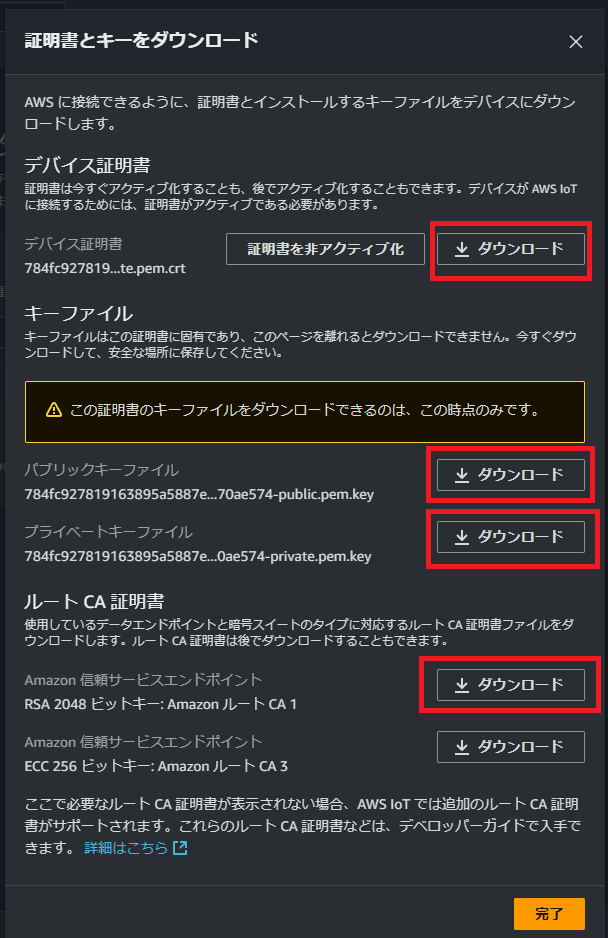
証明書のダウンロードができるポップアップが表示されるのでダウンロードします。
ダウンロードができたら画面左のメニューから「ポリシー」をクリックして「ポリシーを作成」をクリックします。
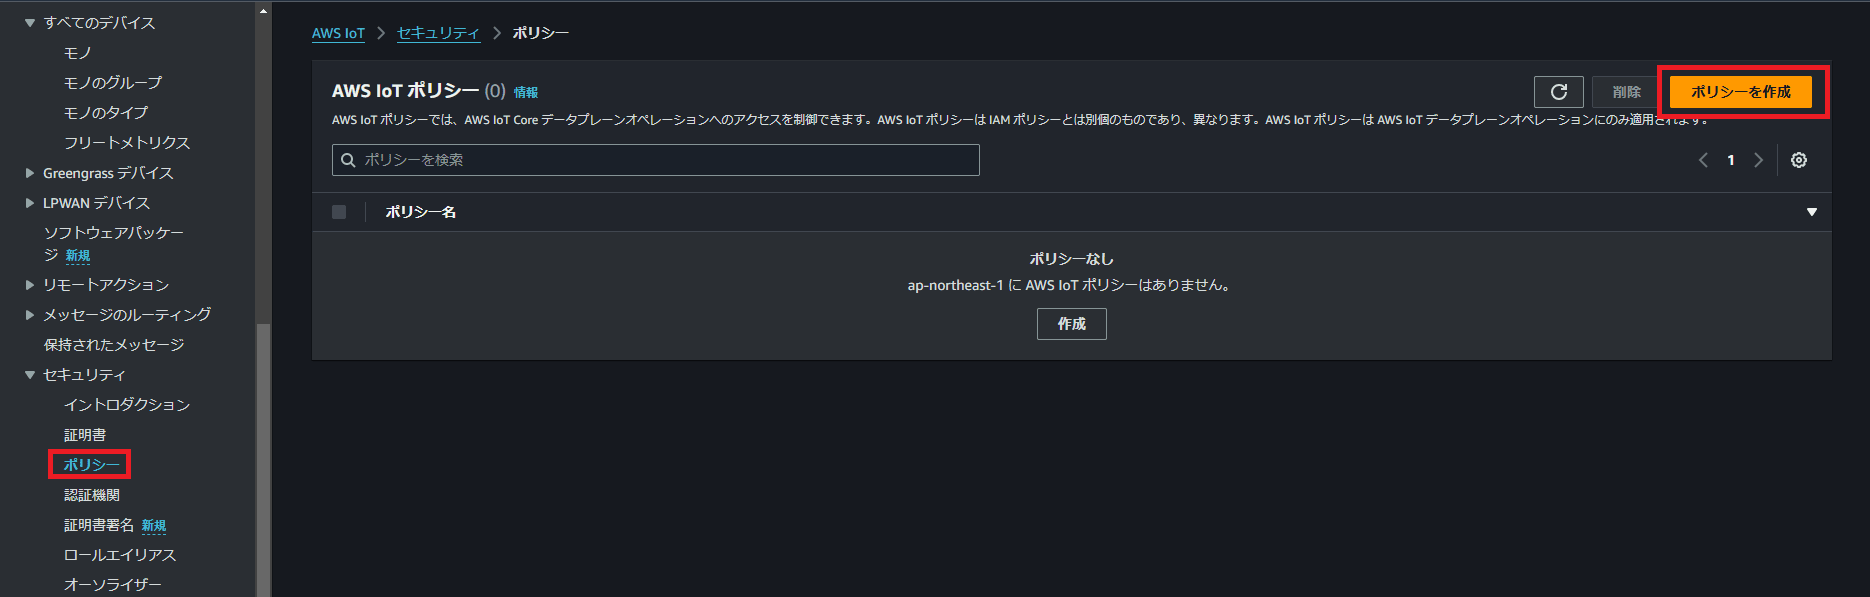
画面が遷移したら「ポリシー名」を入力します。
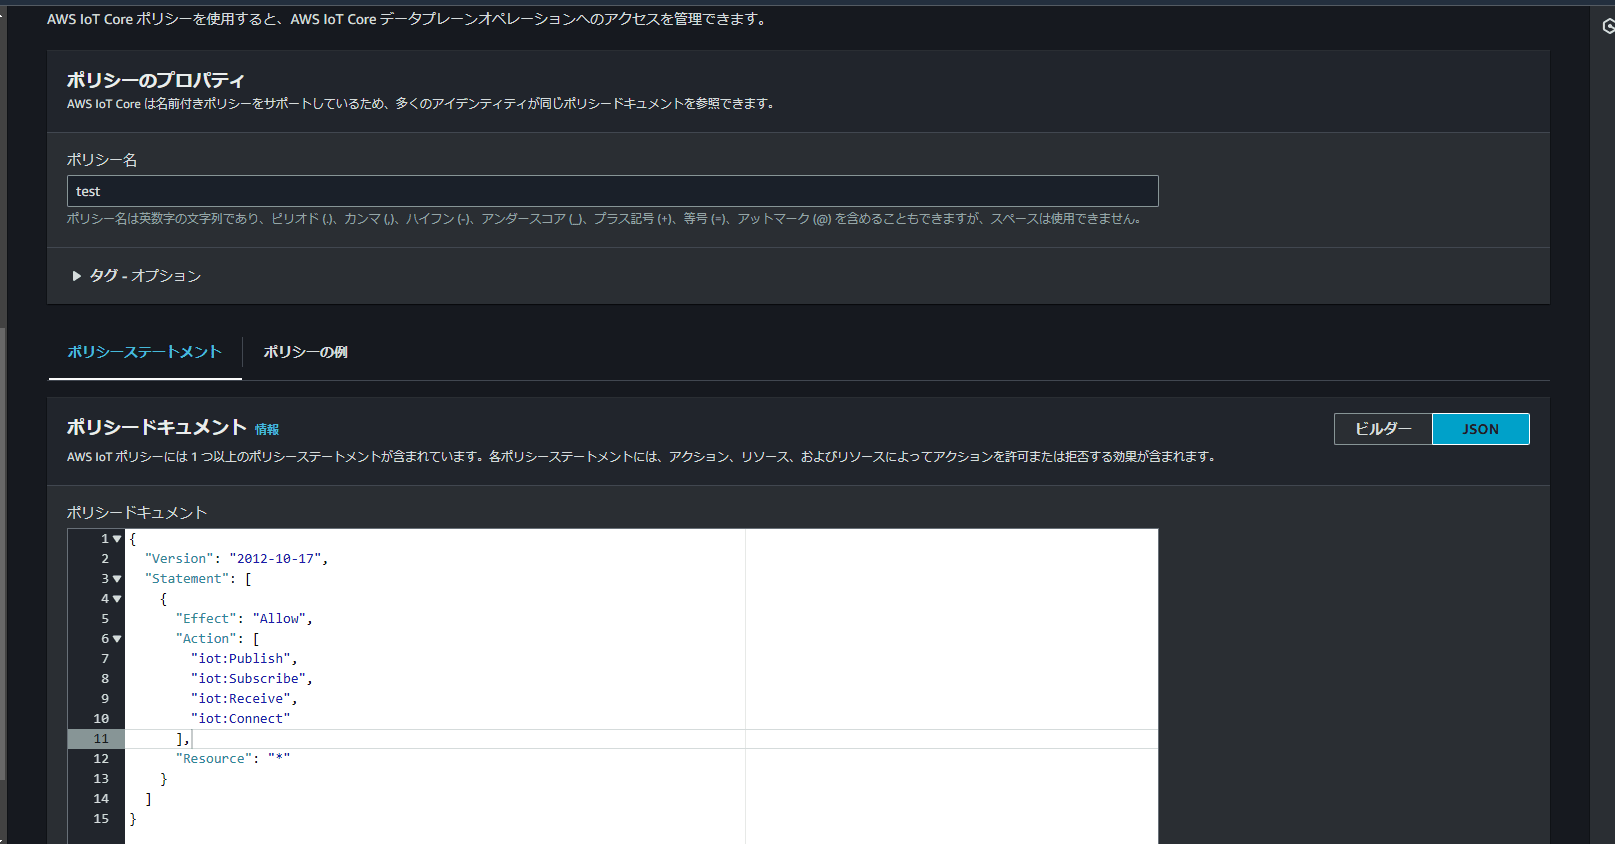
ポリシー名を入力したら「ポリシードキュメント」に下記のJSONを入力します。
入力後、画面下の「作成」をクリックします。
{
    "Version": "2012-10-17",
    "Statement": [
        {
            "Effect": "Allow",
            "Action": [
                "iot:Publish",
                "iot:Subscribe",
                "iot:Receive",
                "iot:Connect"
            ],
            "Resource": [
                "*"
            ]
        }
    ]
}
ポリシーを作成したら画面左のメニューから「証明書」をクリックして先ほど作成した証明書を選択します。
選択後、画面右上の「アクション」から「ポリシーをアタッチ」をクリックします。
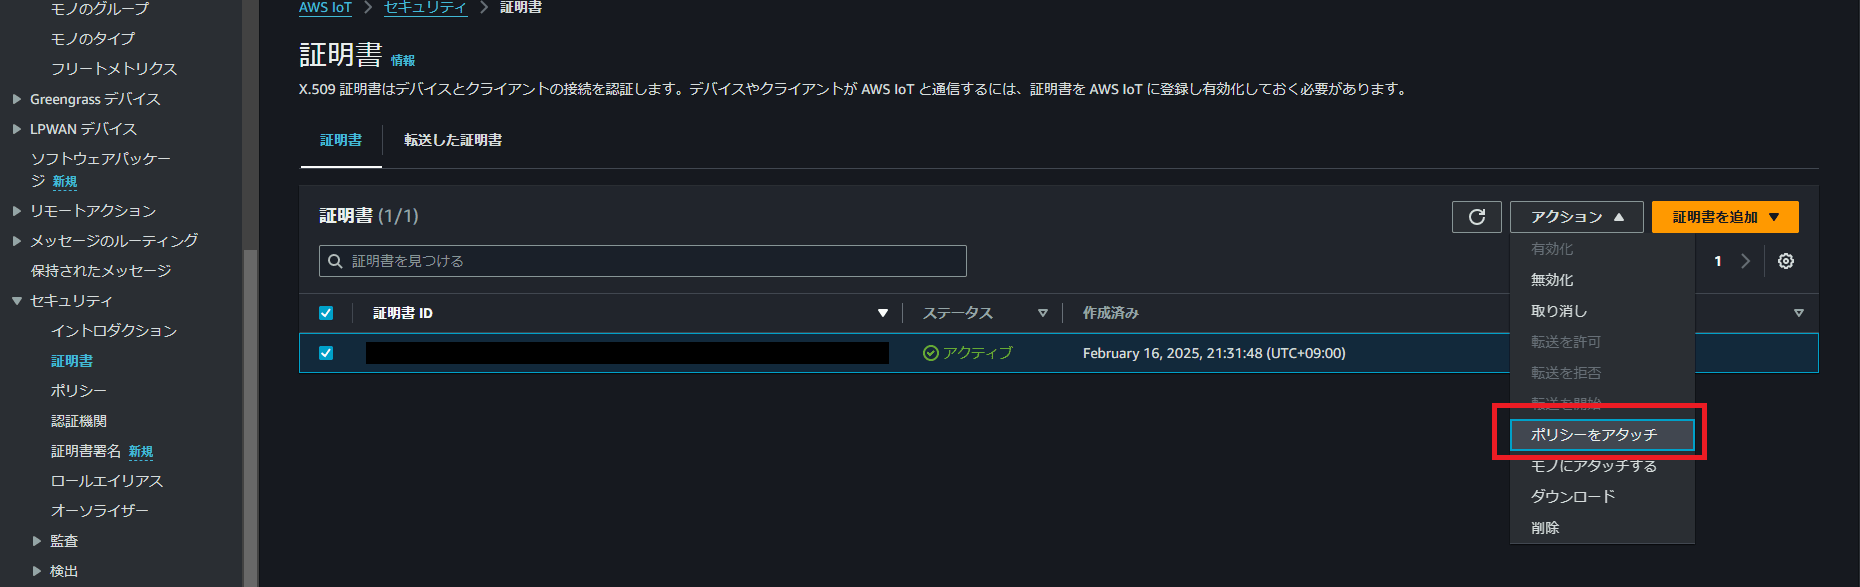
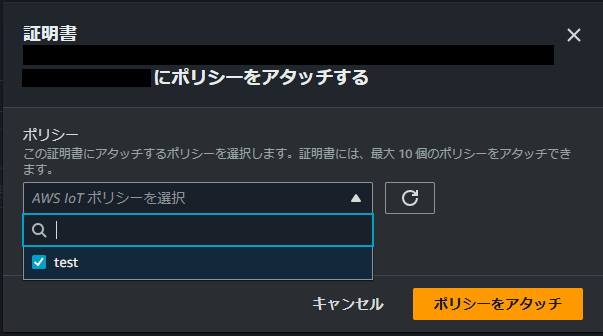
クリックしたら上記で作成したポリシーを選択してアタッチします。
EC2内の設定
共通設定
AWS IoT Coreの設定が完了したらEC2に接続してAWS IoT Device SDKをインストールします。
AWS IoT Device SDKはPublisher EC2とSubscriber EC2の両方でインストールします。
EC2に接続したら以下のコマンドを実行してください。
sudo dnf install pip -y
python3 -m pip install awsiotsdk
Publisher EC2設定
インストールが完了したらEC2内で動かすPythonのコードを作成します。
以下のコードはPublisher EC2で動かします。
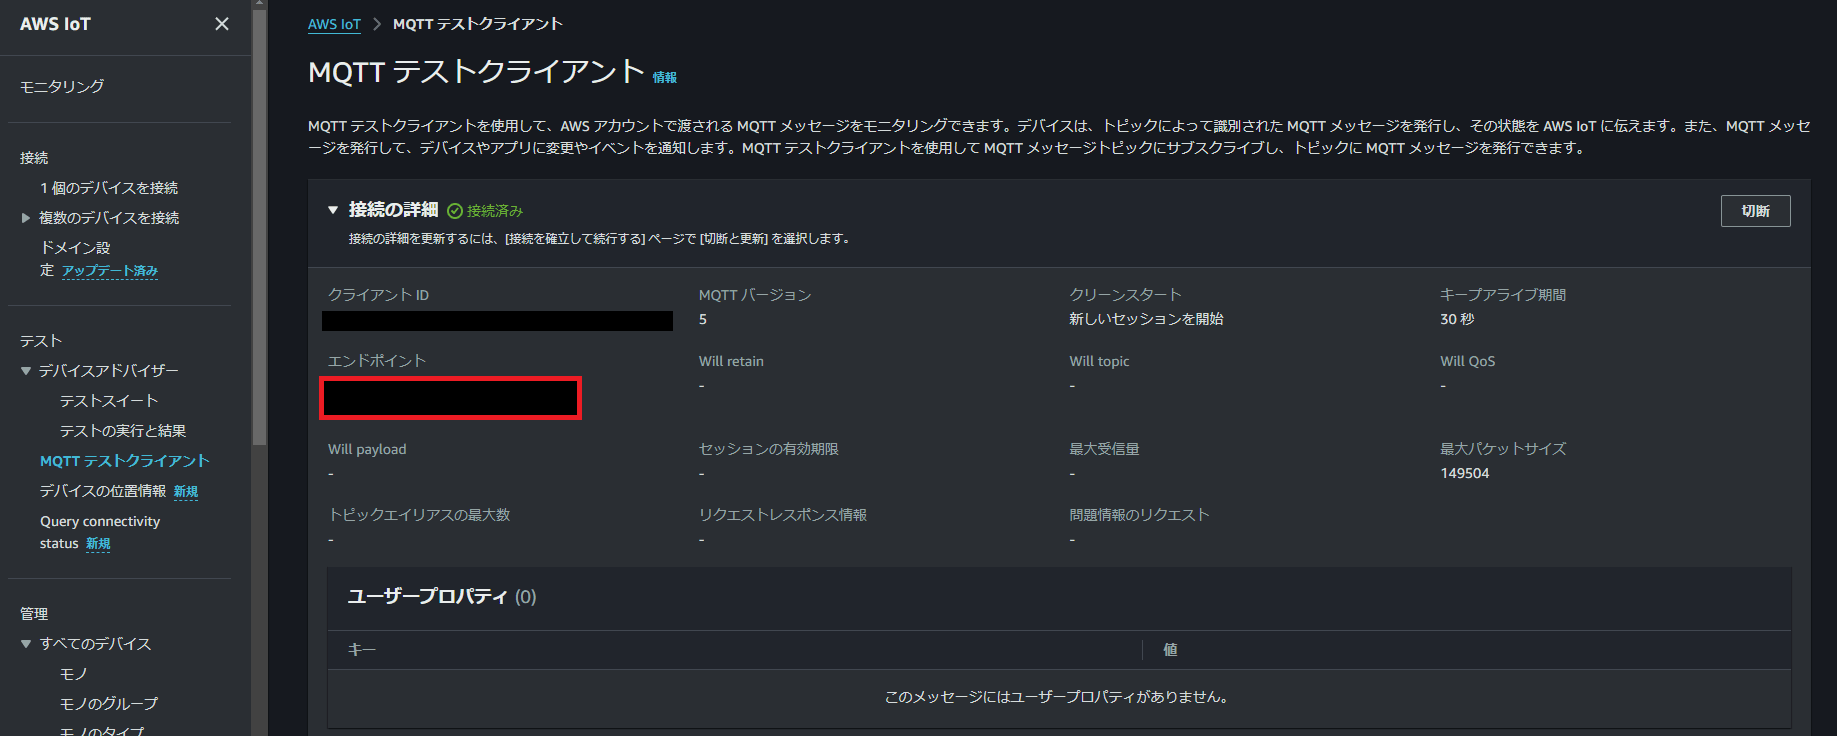
「ENDPOINT」はMQTTテストクライアント画面から確認できるエンドポイントに書き換えます。(確認方法は下記に記載します)
「PATH_TO_CERTIFICATE」はダウンロードしてきたデバイス証明書の名前に変更します。
「PATH_TO_PRIVATE_KEY」はダウンロードしてきた秘密鍵の名前に変更します。
「PATH_TO_AMAZON_ROOT_CA_1」はダウンロードしてきたルートCA証明書の名前に変更します。
# Copyright Amazon.com, Inc. or its affiliates. All Rights Reserved.
# SPDX-License-Identifier: MIT-0

from awscrt import io, mqtt, auth, http
from awsiot import mqtt_connection_builder
import time as t
import json

# Define ENDPOINT, CLIENT_ID, PATH_TO_CERTIFICATE, PATH_TO_PRIVATE_KEY, PATH_TO_AMAZON_ROOT_CA_1, MESSAGE, TOPIC, and RANGE
ENDPOINT = "MQTTテストクライアント画面から確認できるエンドポイント"
CLIENT_ID = "testDevice"
PATH_TO_CERTIFICATE = "./ダウンロードしてきたデバイス証明書"
PATH_TO_PRIVATE_KEY = "./ダウンロードしてきた秘密鍵"
PATH_TO_AMAZON_ROOT_CA_1 = "./AmazonRootCA1.pem"
MESSAGE = "Hello World"
TOPIC = "test/testing"
RANGE = 20

# Spin up resources
event_loop_group = io.EventLoopGroup(1)
host_resolver = io.DefaultHostResolver(event_loop_group)
client_bootstrap = io.ClientBootstrap(event_loop_group, host_resolver)
mqtt_connection = mqtt_connection_builder.mtls_from_path(
            endpoint=ENDPOINT,
            cert_filepath=PATH_TO_CERTIFICATE,
            pri_key_filepath=PATH_TO_PRIVATE_KEY,
            client_bootstrap=client_bootstrap,
            ca_filepath=PATH_TO_AMAZON_ROOT_CA_1,
            client_id=CLIENT_ID,
            clean_session=False,
            keep_alive_secs=6
            )
print("Connecting to {} with client ID '{}'...".format(
        ENDPOINT, CLIENT_ID))
# Make the connect() call
connect_future = mqtt_connection.connect()
# Future.result() waits until a result is available
connect_future.result()
print("Connected!")
# Publish message to server desired number of times.
print('Begin Publish')

i = 0

while True:
    i = i + 1
    data = "{} [{}]".format(MESSAGE, i)
    message = {"message" : data}
    mqtt_connection.publish(topic=TOPIC, payload=json.dumps(message), qos=mqtt.QoS.AT_LEAST_ONCE)
    print("Published: '" + json.dumps(message) + "' to the topic: " + "'test/testing'")
    t.sleep(1)
print('Publish End')
disconnect_future = mqtt_connection.disconnect()
disconnect_future.result()
エンドポイントはAWS IoT Coreの画面左のメニューから「MQTTテストクライアント」をクリックすると確認できます。
ファイルを作成したらデバイス証明書、秘密鍵、ルートCA証明書、上記のPythonコードをSCPコマンドでPublisher EC2に送付します。
scp -i "Systems Manager Parameter Storeで確認した秘密鍵" デバイス証明書 ec2-user@Publisher EC2のパブリックIP:/home/ec2-user/
scp -i "Systems Manager Parameter Storeで確認した秘密鍵" 秘密鍵 ec2-user@Publisher EC2のパブリックIP:/home/ec2-user/
scp -i "Systems Manager Parameter Storeで確認した秘密鍵" ルートCA証明書 ec2-user@Publisher EC2のパブリックIP:/home/ec2-user/
scp -i "Systems Manager Parameter Storeで確認した秘密鍵" Pythonファイル名 ec2-user@Publisher EC2のパブリックIP:/home/ec2-user/
ファイルが送付できたらPublisher EC2に接続して以下のコマンドを実行します。
sudo su ec2-user
cd
chmod 755 Pythonファイル名
python3 Pythonファイル名
コマンドを実行すると以下のようにAWS IoT Coreに送っている内容が表示されます。
[ec2-user@ip-10-0-0-65 ~]$ python3 publisher.py
Connecting to MQTTテストクライアント画面から確認できるエンドポイント with client ID 'testDevice'...
Connected!
Begin Publish
Published: '{"message": "Hello World [1]"}' to the topic: 'test/testing'
Published: '{"message": "Hello World [2]"}' to the topic: 'test/testing'
Published: '{"message": "Hello World [3]"}' to the topic: 'test/testing'
Published: '{"message": "Hello World [4]"}' to the topic: 'test/testing'
Published: '{"message": "Hello World [5]"}' to the topic: 'test/testing'
Published: '{"message": "Hello World [6]"}' to the topic: 'test/testing'
Published: '{"message": "Hello World [7]"}' to the topic: 'test/testing'
Published: '{"message": "Hello World [8]"}' to the topic: 'test/testing'
Published: '{"message": "Hello World [9]"}' to the topic: 'test/testing'
Published: '{"message": "Hello World [10]"}' to the topic: 'test/testing'
Published: '{"message": "Hello World [11]"}' to the topic: 'test/testing'
Published: '{"message": "Hello World [12]"}' to the topic: 'test/testing'
Published: '{"message": "Hello World [13]"}' to the topic: 'test/testing'
Published: '{"message": "Hello World [14]"}' to the topic: 'test/testing'
Published: '{"message": "Hello World [15]"}' to the topic: 'test/testing'
Published: '{"message": "Hello World [16]"}' to the topic: 'test/testing'
Published: '{"message": "Hello World [17]"}' to the topic: 'test/testing'
Published: '{"message": "Hello World [18]"}' to the topic: 'test/testing'
Published: '{"message": "Hello World [19]"}' to the topic: 'test/testing'
Published: '{"message": "Hello World [20]"}' to the topic: 'test/testing'
Subscriber EC2設定
Publisher EC2の設定が完了したら次はSubscriber EC2の設定を行います。
以下のAWS公式のサンプルコードを参考に作成してみました。
「ENDPOINT」はMQTTテストクライアント画面から確認できるエンドポイントに書き換えます。(確認方法は下記に記載します)
「PATH_TO_CERTIFICATE」はダウンロードしてきたデバイス証明書の名前に変更します。
「PATH_TO_PRIVATE_KEY」はダウンロードしてきた秘密鍵の名前に変更します。
「PATH_TO_AMAZON_ROOT_CA_1」はダウンロードしてきたルートCA証明書の名前に変更します。
from awscrt import io, mqtt, auth, http
from awsiot import mqtt_connection_builder
import time as t

# Define ENDPOINT, CLIENT_ID, PATH_TO_CERTIFICATE, PATH_TO_PRIVATE_KEY, PATH_TO_AMAZON_ROOT_CA_1, MESSAGE, TOPIC, and RANGE
ENDPOINT = "MQTTテストクライアント画面から確認できるエンドポイント"
CLIENT_ID = "testDevice"
PATH_TO_CERTIFICATE = "./ダウンロードしてきたデバイス証明書"
PATH_TO_PRIVATE_KEY = "./ダウンロードしてきた秘密鍵"
PATH_TO_AMAZON_ROOT_CA_1 = "./AmazonRootCA1.pem"
TOPIC = "test/testing"

def on_message_received(topic, payload, **kwargs):
    print("Received message from topic '{}': {}".format(topic, payload))

# Spin up resources
event_loop_group = io.EventLoopGroup(1)
host_resolver = io.DefaultHostResolver(event_loop_group)
client_bootstrap = io.ClientBootstrap(event_loop_group, host_resolver)
mqtt_connection = mqtt_connection_builder.mtls_from_path(
            endpoint=ENDPOINT,
            cert_filepath=PATH_TO_CERTIFICATE,
            pri_key_filepath=PATH_TO_PRIVATE_KEY,
            client_bootstrap=client_bootstrap,
            ca_filepath=PATH_TO_AMAZON_ROOT_CA_1,
            client_id=CLIENT_ID,
            clean_session=False,
            keep_alive_secs=6
            )
print("Connecting to {} with client ID '{}'...".format(
        ENDPOINT, CLIENT_ID))
# Make the connect() call
connect_future = mqtt_connection.connect()
# Future.result() waits until a result is available
connect_future.result()
print("Connected!")
# サブスクライブ
print('Begin Subscribe')
subscribe_future, packet_id = mqtt_connection.subscribe(topic=TOPIC, qos=mqtt.QoS.AT_LEAST_ONCE, callback=on_message_received)
subscribe_result = subscribe_future.result()
while True:
    t.sleep(5)
disconnect_future = mqtt_connection.disconnect()
disconnect_future.result()
ファイルを作成したらデバイス証明書、秘密鍵、ルートCA証明書、上記のPythonコードをSCPコマンドでSubscriber EC2に送付します。
scp -i "Systems Manager Parameter Storeで確認した秘密鍵" デバイス証明書 ec2-user@Subscriber EC2のパブリックIP:/home/ec2-user/
scp -i "Systems Manager Parameter Storeで確認した秘密鍵" 秘密鍵 ec2-user@Subscriber EC2のパブリックIP:/home/ec2-user/
scp -i "Systems Manager Parameter Storeで確認した秘密鍵" ルートCA証明書 ec2-user@Subscriber EC2のパブリックIP:/home/ec2-user/
scp -i "Systems Manager Parameter Storeで確認した秘密鍵" Pythonファイル名 ec2-user@Subscriber EC2のパブリックIP:/home/ec2-user/
ファイルが送付できたらPublisher EC2に接続して以下のコマンドを実行します。
sudo su ec2-user
cd
chmod 755 Pythonファイル名
python3 Pythonファイル名
コマンド実行後しばらくすると以下のようにメッセージが確認できます。
[ec2-user@ip-10-0-0-84 ~]$ python3 subscribepy.py
Connecting to MQTTテストクライアント画面から確認できるエンドポイント with client ID 'testDevice'...
Connected!
Begin Subscribe
Received message from topic 'test/testing': b'{"message": "Hello World [5699]"}'
Received message from topic 'test/testing': b'{"message": "Hello World [5700]"}'
Received message from topic 'test/testing': b'{"message": "Hello World [6350]"}'
さいごに
初めてAWS IoT Coreを使用してみましたが、なんとなくメッセージの送受信方法が理解できました。
AWS IoT Greengrassなんかも今後触ってみたいなと思いました。
![[Amazon FSx for NetApp ONTAP] SMBのサーバーサイドコピーはできるのか確認してみた](https://images.ctfassets.net/ct0aopd36mqt/wp-thumbnail-9e9d102dfa6d7896319b16fe069cdf55/c3bbbeab42ba5764c5a573e979719805/amazon-fsx-for-netapp-ontap)