![[iOS 8] PhotoKit 10 – Photo Editing Extensionの実装 (前篇)](https://devio2023-media.developers.io/wp-content/uploads/2014/11/ios8.png)
[iOS 8] PhotoKit 10 – Photo Editing Extensionの実装 (前篇)
はじめに
前回の記事ではPhoto Editing Extensionの概要を紹介しましたが、今回はPhoto Editing Extensionの実装を扱います。
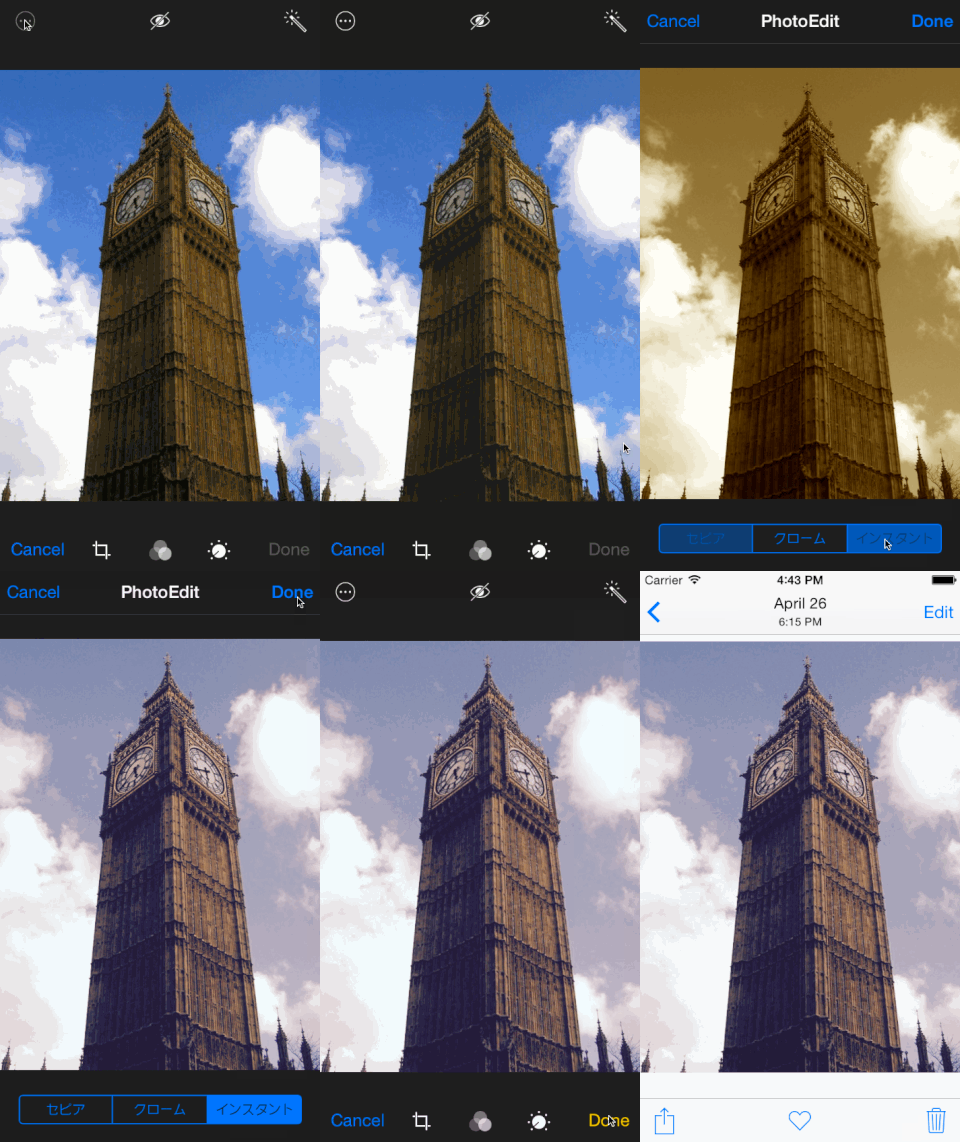
以下の画像のような、写真にフィルターをかけるApp Extensionを実装します。
実装
プロジェクト作成
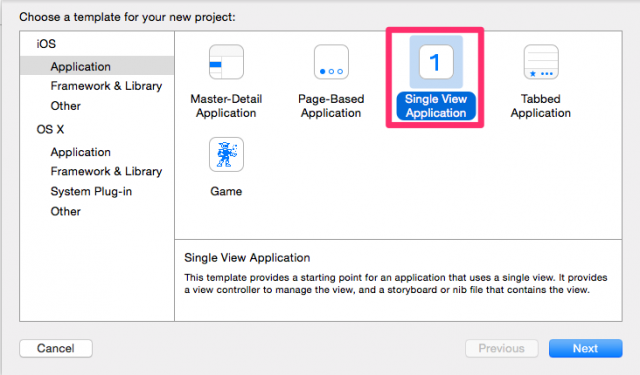
新しいプロジェクトを作成します。今回は「Single View Applicasion」テンプレートを選択します。
ターゲット追加
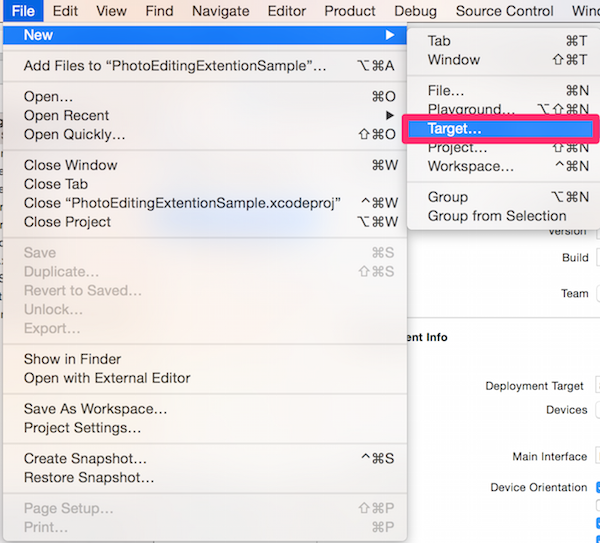
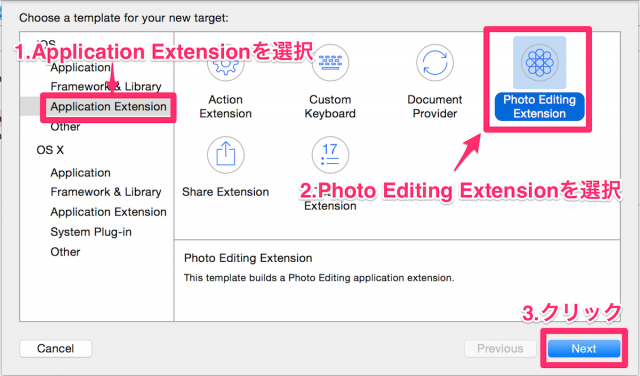
プロジェクトの作成できたら、App Extension用のターゲットを追加します。
Xcodeのメニューの「File」→「New」と辿り、「Target」をクリックします。
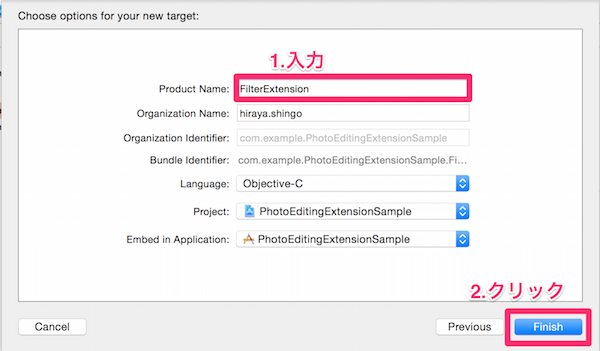
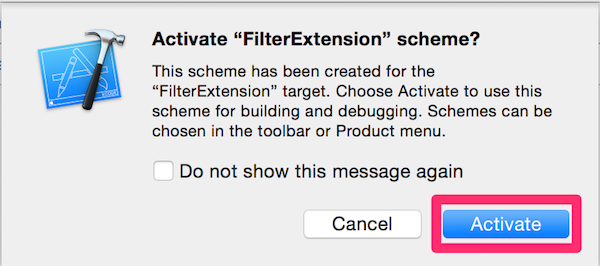
- メインViewControllerのクラスファイル
- storyboardファイル
- Info.plistファイル
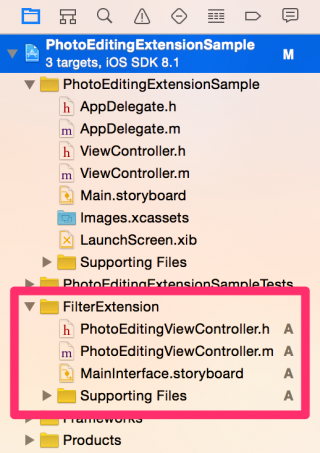
storyboardファイルの編集
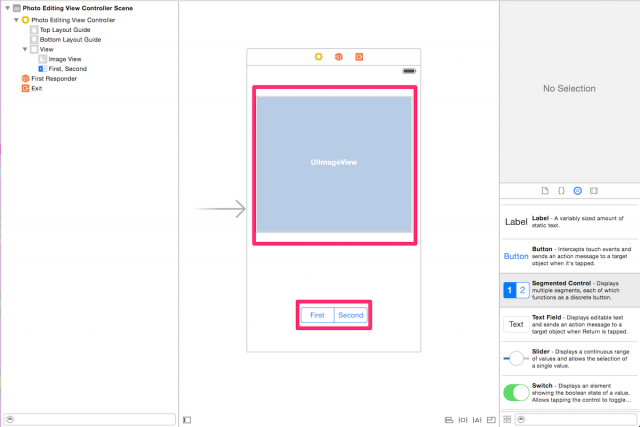
「MainInterface.storyboard」ファイルを編集していきます。
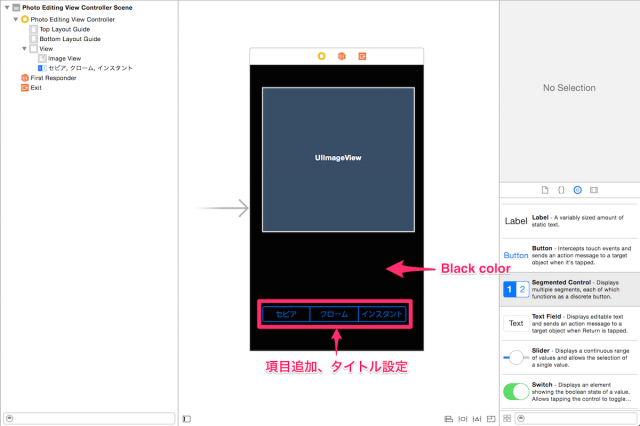
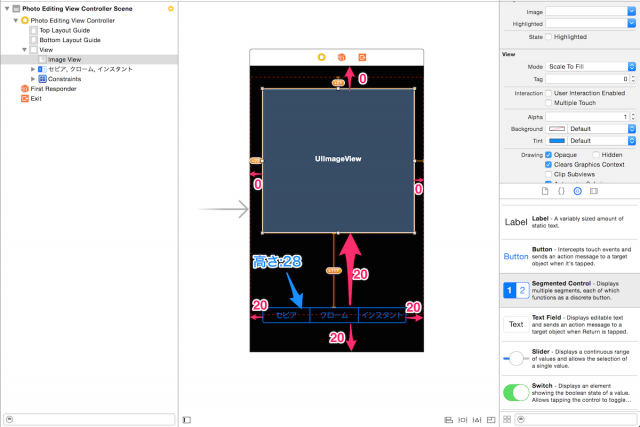
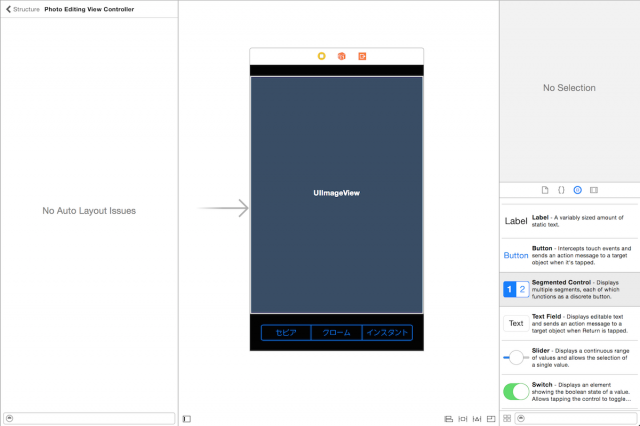
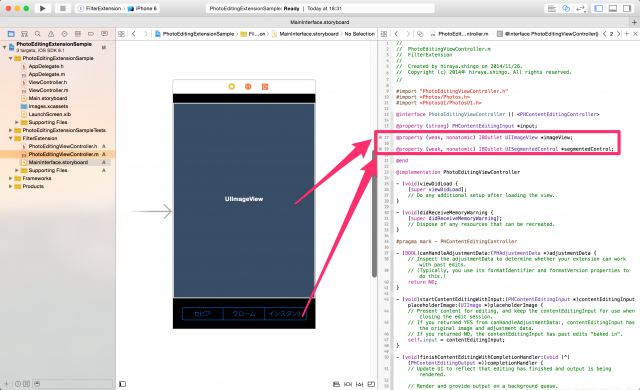
もともと配置してあった「Hello World」ラベルを削除し、 UIImageViewとUISegmentedControlを配置します。
まとめ
今回はターゲットの追加とStoryboardファイルの編集を行いました。Photo Editing Extensionの実装(後編)へ続きます。
本シリーズの記事一覧
- [iOS 8] PhotoKit 1 – Photos Frameworkの概要
- [iOS 8] PhotoKit 2 – Photos Framework – モデルオブジェクトの取得
- [iOS 8] PhotoKit 3 – Photos Framework – モデルオブジェクトのプロパティの編集
- [iOS 8] PhotoKit 4 – Photos Framework – モデルオブジェクトのコンテンツの編集
- [iOS 8] PhotoKit 5 – Photos Framework – モデルオブジェクトの削除
- [iOS 8] PhotoKit 6 – Photos Framework – モデルの変更のハンドリングとコンテンツ編集のrevert
- [iOS 8] PhotoKit 7 – Photos Framework – フォトライブラリへのアクセス許可を得る
- [iOS 8] PhotoKit 8 - UIImagePickerControllerとPhotos Frameworkを組み合わせて使う
- [iOS 8] PhotoKit 9 – Photo Editing Extensionの概要
- [iOS 8] PhotoKit 10 – Photo Editing Extensionの実装 (前篇)
- [iOS 8] PhotoKit 11 – Photo Editing Extensionの実装 (後篇)




![[小ネタ] ラスベガスに到着してからiPhoneのカメラのシャッター音が消えた件 #AWSreInvent](https://devio2023-media.developers.io/wp-content/uploads/2023/11/eyecatch_reinvent-2023-from-lasvegas-dayori.png)

